refurbished bikini top


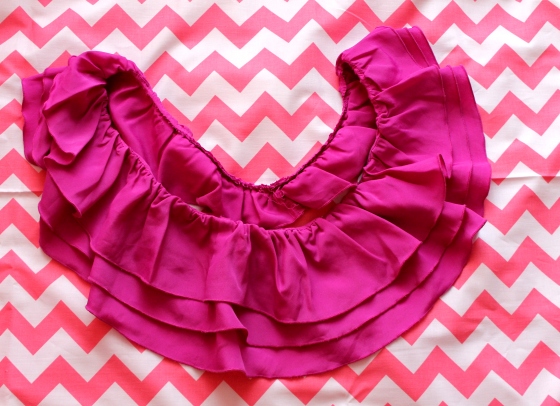
1 frilly top + 1 old bandeau bikini (mine was rust stained from a keys adventure) = brand new top to lay out in!

I have been fiddling around with things in my house, since I really can’t leave for too long, and I discovered this gem of an idea. I am in horrific shape from studying for months, please don’t hold that against the bikini. Also, because I am a future professional, or at least hope to be, I cannot provide full body pictures. You will just have to trust me that this bikini top rocks!!!

First, I pulled the stitches that connected the frilly top to this hideous blouse out.

The top already looks better without all the frill! More on the top later though, today we are concentrated on the frill.

I cut the embellishment off the front of the bikini. Then, cut the frill in half and sewed it all the way around the bikini top. I used a loose hand stitch, because the top still needed a bit of give when worn. I used fabric glue to lay the bottom layer of the frill to the front of the bikini. With my mini sewing machine, using a simple stitch (only stitch it has sadly), I sewed the ends of the frill in on themselves. I could lace a bow through, but they sit well, and hide the hardware from the bikini clasp as is.

There you have it, one of my first documented sewing adventured gone right! Hope you find this idea helpful<3


red white and blue breakfast tart

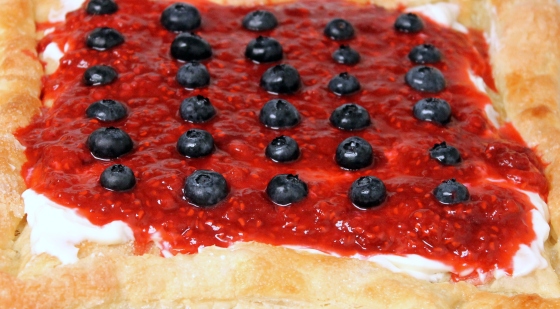
This is the perfect breakfast, for every American, on Independence Day;] I adapted this recipe from Real Simple.

On the 4th of July, I am going to take the night off to watch fireworks with my sweetie. I am meeting him at his beach house, at Indian Rocks Beach. We will cuddle up in the dunes together with a blanket and snacks to watch the show over the water. I can’t wait! John just left for the beach and I am stuck inside:[ I know I should probably study, but I desperately need some freedom from my books.

Ingredients: 

1 small package of raspberries
1 lemon (zest 1/3 and juice 1/2)
30 or so blueberries (about 2 handfulls)
1 pre-made frozen puff pastry
1 egg beaten (you can choose to add a small splash of heavy cream)
white sugar on hand
1/4 cup heavy cream
3 tablespoons confectioners sugar
2 tablespoons butter

Directions: 

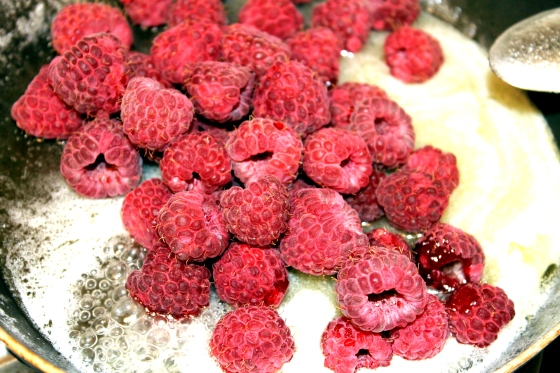
Place your puff pastry on a parchment lined baking sheet, and preheat the oven to 375°. Using a sharp knife, gently score a border around the edge of the pastry, about an inch from the edge. It won’t be perfect and does not need to be. Brush the border with your egg wash and sprinkle it with sugar. You should use a couple tablespoons, but no more than 3. Then, bake the puff pastry until it is golden. While it is cooling, beat together your cream cheese, lemon zest, and confectioners sugar, until smooth. Then, spread the cream cheese mixture within the borders of the pastry, making sure not to go past your scored edges. In a pan, on medium heat, add your butter, 4 tablespoons sugar, and your lemon juice. When the sugar is dissolved, add your raspberries. Cook, stir, and gently smush them, until you have a thick sauce. I poured all the sauce over my cream cheese mixture, but you can use 1/2 (or any amount in between) if you do not want your pastry too wet. The sauce is great for dipping toast, making drinks, and so many other things, so save it if you do not use it all on your pastry. Line the blueberries on top and serve immediately.

Have a happy and safe Independence Day!

make and wait ginger chicken

Yesterday, my sweet sweet boyfriend, John, brought me an orchid. He is very supportive of me studying for the Bar and really believes in me. I, on the other hand, do not have as much faith in my abilities. Recently, I have been panicking less often, but with wayyyyy more gusto. Needless to say, my stress eating is out of control! I have not been blogging my recipes, but this one I just had to take time for.

This is a make and wait recipe, because you must make it and wait at least 3 hours before finishing the last step and serving it. I make my chicken the night before. The recipe goes from being average to FANTASTIC in the time that you wait and let it sit. I don’t know why I haven’t thought to make this until now. John’s lovely Asian orchid must have inspired me;]

Ingredients: 

1 inch by one inch cube of fresh ginger peeled and chopped up
2 small garlic cloves sliced into slivers
1 large chicken breast chopped up
low sodium soy sauce on hand
a few shakes ground black pepper
a few shakes garlic powder
organic coconut oil (or vegetable oil, or any other relatively neutral tasting oil)
pam cooking spray (optional)

Directions:

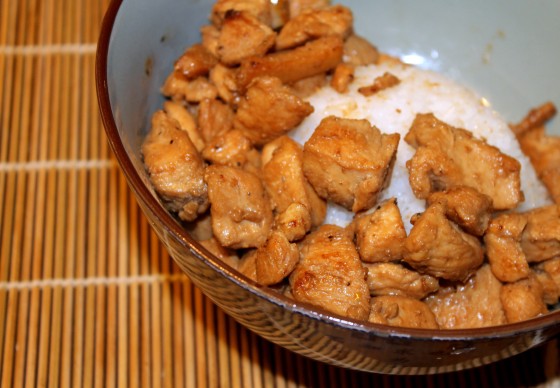
Put a large skillet (or wok if you have one) on the stove, on medium heat. Coat your pan with coconut oil and add your sliced garlic. When you smell the garlic, add the chicken, ginger, pepper, and garlic powder. Stir everything around for 30 seconds and then add just enough soy sauce to coat everything. Do not drown your chicken in soy sauce. Cook your chicken until it is no longer pink. Then, empty the contents of your pan (including any liquids) into a bowl and let it cool. Once everything is cool, cover the bowl and put it in your fridge for at least 3 hours. I try and let my chicken sit over night. DO NOT EAT THE CHICKEN NOW! Your dish will taste 100 times better if you wait and follow the last step. When you can no longer wait to serve your chicken, heat a clean pan up on medium high heat and spray it with pam (or just add a touch of oil). Add all the contents of your bowl to the pan and sear. When there are no more liquids and your chicken is a lovely shade of brown, you are ready to serve:] Serve the chicken over rice or in lettuce wraps. You will be so glad you waited!

irish dark soda bread

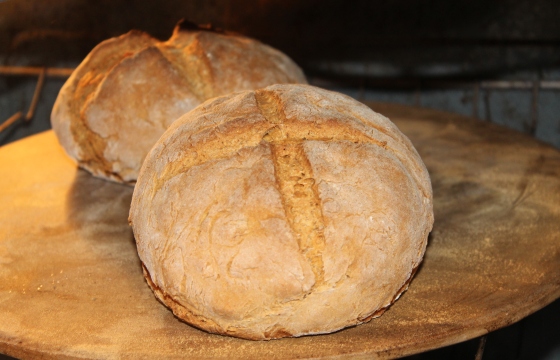
My boyfriend, John, is Irish. Sadly, he is not in touch with his Irish heritage at all. He doesn’t even celebrate St. Patrick’s Day! Armed with an old recipe I found at my Grandma’s house, I made my first attempt at trying to reconnect John with his roots.

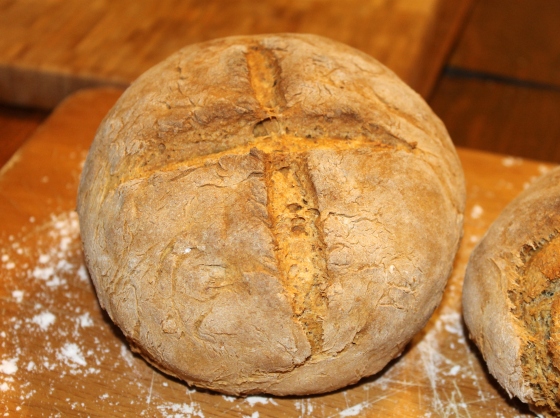
This recipe yields 2 loaves and I am told they are very authentic tasting. The loaves had hard crusts, but fairly soft centers, and were pretty weighty. I would liken their flavor to that of a soft pretzel and personally found it very pleasant. Sadly, John did not feel the same. He is a very picky eater. Soda bread may be an acquired taste, but I enjoyed it, and think that this recipe is nice. If you know any REAL Irish people, or need ideas for St. Patrick’s Day next year, these loaves are super simple to make and gorgeous:] I am not giving up on John after one recipe though, so stay tuned!

Ingredients: 

3 cups all purpose flour
2 1/4 cups buttermilk (or milk with a few drops of vinegar in it)
2 tablespoons brown sugar
1 tablespoon baking powder
2 cups whole wheat flour
2 teaspoons baking soda

Directions: 

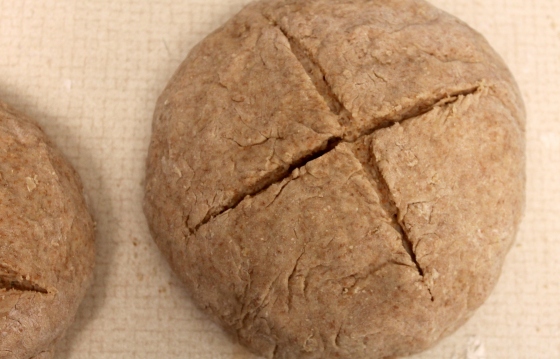
First, add all the dry ingredients together, making sure to break up all the brown sugar clumps. Add the buttermilk and stir until everything is combined. Then, knead the dough for a couple minutes. This dough should be ready fairly quickly. Divide the dough in half and spin each half, while patting them into round loaves. When you have 2 round loaves, lightly score an x on each loaf. If you score them too deeply your loaves will split and will not be as attractive. Preheat your oven to 400° and let your loaves set for 10 minutes. Bake your loaves on the center rack of your oven for 40 minutes. I baked my loaves directly on my pizza stone. If you do not have a pizza stone, a parchment lined sheet will do the trick. Serve immediately or store immediately, because these loaves tend to harden if you set them out.

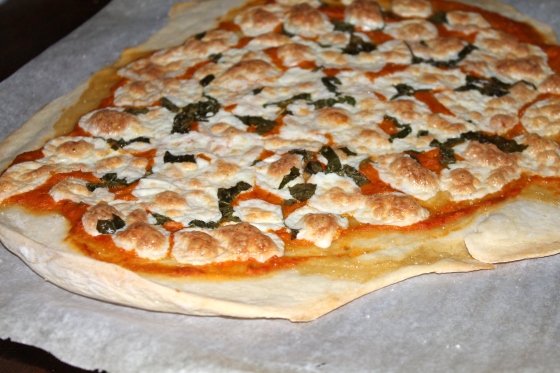
pearl pizza

This is my six month anniversary post!!!! Eeeeeeep! When I started this blog, my last semester in law school, I had no idea how wild it would grow. Like a weed, it has cracked the concrete that hid many areas of my life from light. My silly crafts, my recipes, my thoughts, my fears, and my dreams have become publicized. I couldn’t be more happy!

Besides having fun, one of the most rewarding things has been making new friends to connect with. I get so excited when I realize I have time to read posts, even when I only have short breaks and I don’t have time to join the party. I want to thank all my friends who read my blog, everyone who has contributed to it, and all the bloggers that post amazing things for me to read!

If you are wondering, “why pizza?” Pizza is my Dad’s favorite food. Sadly, I have not seen any of my family members since I started studying and I really miss them.

Toppings:

1 packet fresh mozzarella pearls
a few sprigs fresh Italian oregano
1 handful fresh basil, chopped up

Dough:

1/2 recipe fresh baguette dough, rolled flat, instead of rolled into a baguette

Sauce: 

1 handful cherry tomatoes cut in half
3 small garlic cloves, chopped up
extra virgin olive oil
garlic powder
1 sliver onion, diced
garlic salt (optional)

Directions: 

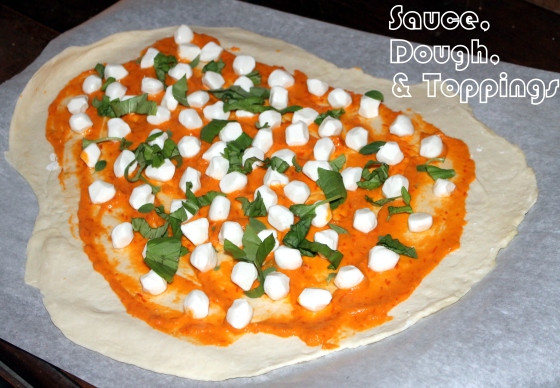
When your dough is rolled out, cover it with a clean cloth, and start your sauce. Coat a medium sized pan with olive oil and add the garlic. Cook on medium high heat. When you start smelling the garlic’s aroma, add your onions and cook a minute before adding the cherry tomatoes. Add a few shakes of garlic powder and cook for a few minutes, until the tomatoes start to look soggy. When your veggies are very wilted, add them to your food processor (I used my magic bullet), and blend them smooth. Add the sauce to your dough and add a few shakes of garlic salt if you wish. Then, cover your sauce in pearls and cut herbs. Preheat your oven to 375° and place a pan with a cup of water on your bottom rack. If you have a pizza stone, place it on your middle rack. You may cook your pizza directly on the stone. I was worried about my pizza sliding skills, so I placed my pizza on a parchment lined sheet. Cook for 15 minutes on 375°, then lower to 350°, and cook until the crust is nice and browned.

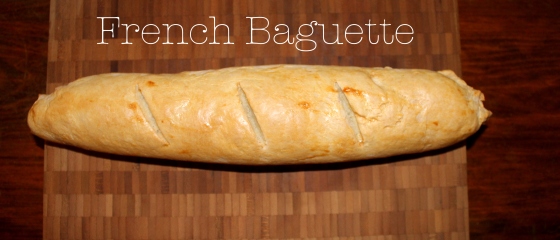
traditional french baguette

I am happy to report that my studying is going well. I got sick last week and fell behind a little. It really threw me into a panic, and when I panic, I eat! I made this fabulous recipe to physically subdue my panic and called my Bar coach to quell my fears. By the end of it, I was back on track and stuffed:]

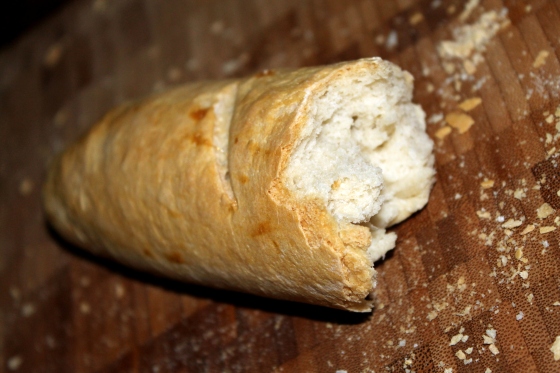
This recipe yields 2 baguettes. The baguettes have a wonderfully crisp crust and soft center. The crust is more crisp and the flavor is more rich than an American baguette. I adore this recipe because each baguette is enough for John and I to have with dinner, and not have too much left over (or any at all, depending on how little restraint I show). I like to make one baguette and save 1/2 the dough for later in the week, which is perfect because I HATE stale bread. Stale bread and soggy pasta are a hell on earth I would never willingly endure.

Ingredients:

1 packet active yeast
4 cups all purpose flour
2 tsp salt
1 and 1/2 cup lukewarm water
1 cup hot water
olive oil on hand
butter the parchment paper you line your baking sheet with
egg bath (1 egg white whisked with a splash of cold water)

Directions:

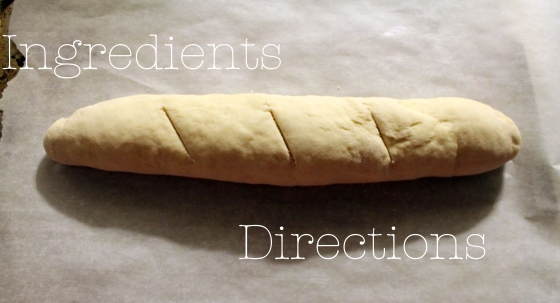
Combine the flour, salt, and yeast in a medium sized bowl. Make a well in the center and add your lukewarm water. Mix with a spoon, until you have a solid mass. Then, mix with your hand (pretty much kneading in the bowl) for around 20 minutes. I enjoy watching tv while doing this. After that, grease a large bowl with olive oil and place your dough in the bowl. Coat the top of your dough with olive oil and loosely place plastic wrap over the top of the bowl. Then, place a clean dish towel over the bowl and sit in a dark place for 2 hours. After the 2 hours, your dough will have risen a good bit. Smush the dough down in the middle and pull the sides into the middle. You are getting the excess air out of the dough. Next, cut the dough in half. I only use 1/2, you can put the other  1/2 in the fridge, or make it immediately. Take 1/2 the dough and roll it away from you, on a floured countertop, forming the baguette. Once your baguette is formed, sprinkle a couple paper towels with flour and cover the baguette. Put the baguette on your lined baking sheet, and cover the paper towels with your clean dish towel. Let the baguette rise again for around 40 minutes. When you are ready to bake, put a pizza stone on the middle rack of your oven (if you don’t have one, don’t worry) and a pan with 1 hot cup of water in it on the bottom rack. Preheat your oven to 400°. Once the oven is preheated, score your dough and put your baking sheet onto the middle rack. Cook for 20 minutes, then turn your oven down to 350. After 25 minutes, brush your baguette with your egg bath. I couldn’t find my brush, so I used paper towels to do this. The uneven surface left streaks on the final product, but was better than nothing. Bake for 5-10 more minutes and remove.

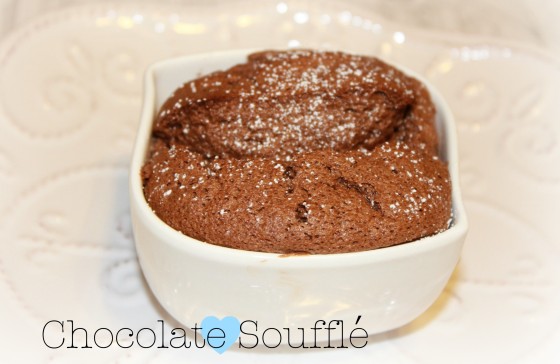
everyday chocolate soufflé

Growing up, Audrey Hepburn’s Sabrina was always my favorite movie. I was in love with David Larrabee, fancy balls, and soufflé. I remember the Baron saying to Sabrina, “[a] woman happily in love, she burns the soufflé. A woman unhappily in love, she forgets to turn on the oven.” I must have a pretty extraordinary love, because I think my soufflés are pretty perfect!

I discovered that I could still make a lovely souffle, using everyday ingredients, on a weeknight, by just chopping out a lot of frill. Like Audrey, these soufflés are easy to put together and are always in good taste<3

1/4 cup sugar
1/2 cup ghirardelli bittersweet chocolate chips (or 60% cacao chocolate chips)
2 tbs butter (plus butter your ramekins- I made 4 soufflés with this recipe)
4 egg whites
1 egg yolk
powdered sugar for dusting

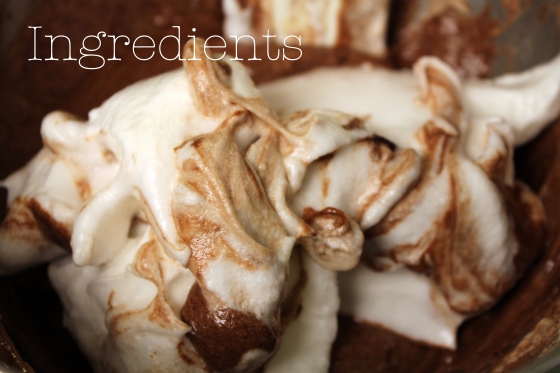
Sit your eggs out on the counter at least an hour before you plan on cooking. When you are ready to cook, preheat your oven to 375°. Slowly melt your chocolate and your butter together and stir smooth. When your mixture is smooth, pour it into a medium sized bowl and let it sit for 15 minutes, until it is fully cooled. When it is cool, mix in the egg yolk. Set your chocolate mixture aside, and in another medium bowl, whip your egg whites into soft peaks. Soft peaks will look like the picture above, to the left. When you have soft peaks, slowly mix in your sugar, until you have stiff peaks. Stiff peaks will look like the picture above, to the right. When you have stiff peaks, spoon 1/3 of your egg white mixture into your chocolate mixture. Mix gingerly until there are no streaks of white showing. Then, fold your remaining egg whites in slowly and carefully. When you no longer have any visible white streaks, pour your batter into your ramekins. If you want taller soufflés than the ones I have, pour your batter closer to the top. Be careful though, soufflés are known to overflow on occasion. Bake your soufflés for around 18-20 minutes. Do not open your oven before 18 minutes! Watch your soufflés grow through the glass. A soufflé will naturally deflate a little the first 5 minutes it spends out of the oven, so dust yours with sugar and serve them asap<3

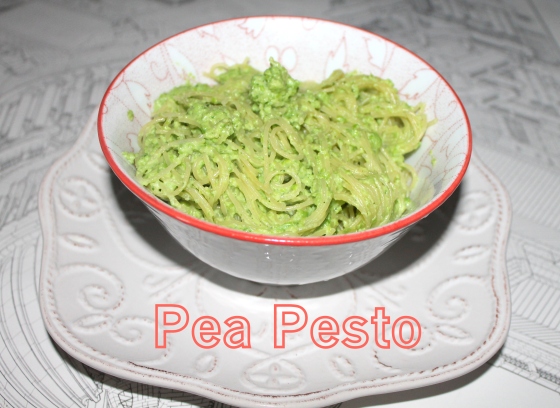
easy peasy pea pesto

I have been in love with the hanging herb garden my Dad helped me build. It has been key in supplying fresh ingredients for making a lot of yummy dishes, like this one. My best friend, Michelle, told me that if I ate well and exercised more, maybe my negative Nancy Bar bawling would end. I think she was right! She reminds me of how the crazy can come out of people who are hungry, stressed, and tired. Having friends like her, help my anxious butt survive this crazy and uncomfortable thing I currently call life.

I discovered this super easy pea pesto recipe a while ago, and I am super obsessed with it right now. I have made it 2 times while studying today. After figuring out that 2 of my best friends had never heard of pea pesto, I just knew I had to post it! For all my paleo friends, like Michelle, the pesto is paleo. Remember to put it over spagetti squash (or something like it) and omit the parmesan cheese.

This recipe makes enough for 2 sides, or one filling meal:]

Ingredients:

1 cup frozen peas (you can use fresh ones if you have them)
a large pinch of grated parmesan (omit this if you are paleo)
4-5 splashes of heavy cream
garlic powder
garlic salt
1/2 handful fresh basil
a bowl of angel hair pasta, or for paleo people spagetti squash to pour your pesto over

Directions:

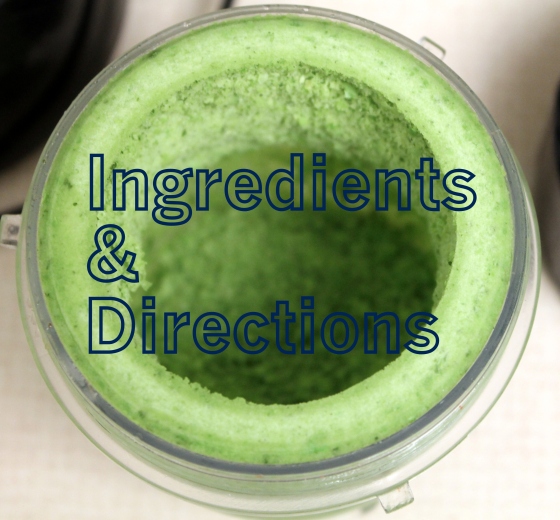
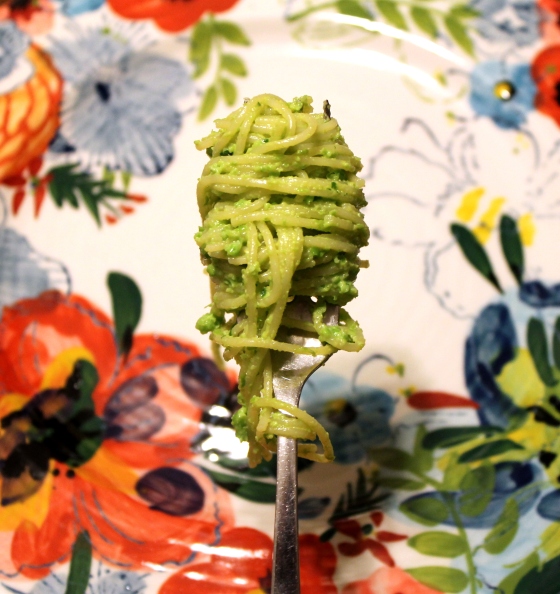
Put the peas, basil, and parm in a food processor (I used the Magic Bullet) and blend until relatively smooth. It will look like the picture above. Then, pour the contents and your cream into a small saucepan on medium. When that begins to simmer, add from 5-10 shakes of garlic powder. I use more rather than less. Let everything come to a boil. Then, pour your pesto over your pasta and mix everything together. Sprinkle the dish with garlic salt and serve.

hanging garden

I saw this hanging garden a while ago, when it circulated around Pinterest. Needless to say, I was pinterested! Side note, if you want to follow me and pin fun stuff together, I have a link to the right that will show you my inner most likes:] Anyway, the garden I saw was just a picture of a garden. I had no idea how to make the lovely hanging garden I saw, but I knew who would, my Dad. My Dad is pretty much a super hero and is always able to help me. He always finds a way to be there for me. That aside, I was right, he knew exactly what to do and bought me all the materials!

We (my dad and I) constructed this garden a few weeks ago, but I haven’t had time to post. I have been studying for the FL Bar every day now. I have even had a true blue “I am going to fail!” moment. I am told everyone will have at least one. So here I am, turning to my favorite stress reliever.

Materials (and tools):

3 mason jars (or as many as you would like to hang)
1 plank wood
3 hose clamps (same # as your mason jars)
3 washers (same # as mason jars)
3 screws (same # as mason jars)
electric drill
small flat head screw driver
picture hanging kit from ACE (or screws and wire to hang 50lbs)
lava rocks
top soil
3 small plants (any kind)
water, sunlight, and love:]

Directions: 

I found the antique piece of pecky cypress that I used at a salvage yard. There are companies that pull wood off of old houses that are being demolished. Google and see if there are any in your area. My piece of wood cost me $15. I think it is much prettier than a regular old plank, like the ones you would find at Lowe’s. The hose clamps have slots in them. I positioned each one the same way. I put them in the position, where the screw used to tighten the clamp, was to my left. My Dad placed a washer over one of the slots and screwed a screw in, using his electric drill. Repeat that process as many times as you want to, we did it 3 times, but do not crowd your board. Keep in mind that an antique board may not be able to hold as much weight. I put lava rocks at the bottom of each of my jars, to drain water, filled the jars with topsoil, added my plants, and watered them. Once the jars were ready, I put them into the hose clamps and tightened the clamps with the small flat head screwdriver until they were stable. Then, I used the kit to hang my lovely garden:]

Thank you for everything, Dad!

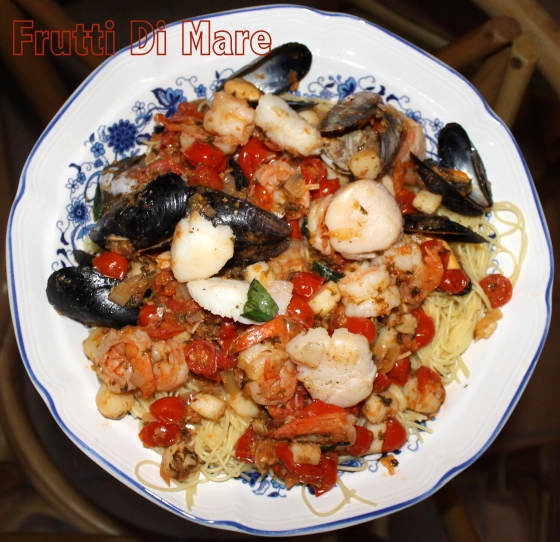
frutti di mare

I start my BarBri preparation class tomorrow! AAAAAAAAhhhhhhh! I have done a little work here and there, but now it is crunch time. This is it people, this is not a drill! I have a few fun crafts and recipes I have not posted yet, so in my spare time I may put them up, but I will mostly be mia now. I have one free day a week, and of course I will use that day to play in the ocean with Darwin and surf the web. Wish me luck!

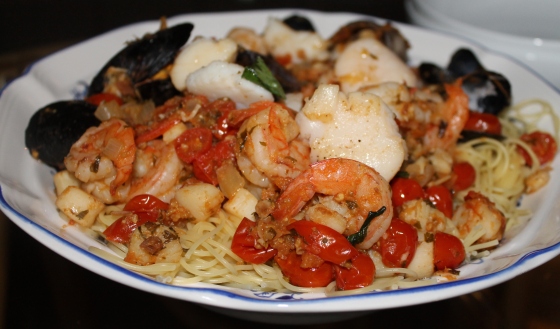
This is one of my favorite recipes. My brother thinks it is the most delicious one he has eaten. I made it for him a few weeks ago, but have forgotten until now to post it. I wish John liked seafood because I would love to make this tonight, and pair it with some Japanese tea cakes for dessert. Yum!
Ingredients: 

1 box angel hair pasta cooked (al dente) and placed in a serving bowl
1/3lb patagonian scallops
5 large sea scallops
1/2lb shrimp (peeled, I left the tails on)
4 clams (scrubbed)
8 mussels (scrubbed)
1 tsp better than bullion chicken flavor
1/2 handful fresh parsley
1 handful fresh basil
Cupcake champagne (or any champagne- you can use wine, but I prefer drinking champagne and love the taste of this cheap champagne)
garlic powder
salt and pepper
a few shakes pepper flakes
4 garlic cloves (peeled)
1 shallot (diced)
1 heirloom tomato
1 pack grape tomatoes (cut in half)
olive oil on hand


What was left after my mom, dad, and I pigged out!

Cooking Directions: 

Take your heirloom tomato and your four garlic cloves, drizzle them with olive oil, sprinkle them with a little salt, and put them in the oven at 350°. Put a skillet on the stove, on medium high, with a little bit of olive oil. Sprinkle a little salt, pepper, and garlic powder on your shrimp and throw them in the pan. Once they are cooked, set them aside and cook your patagonian scallops (also sprinkled with a little salt and pepper), a little at a time. Don’t crowd your pan. Set them aside when done. Check on your tomato and garlic, in the oven, when the garlic is browned a little, take them out. Then, cook your sea scallops (sprinkled with a little salt and garlic powder) a little at a time, again don’t crowd your pan. Add olive oil, whenever needed. Next, start cooking your shallot, after a few minutes, add all your grape tomatoes to the mix. Splash enough champagne into the pan to coat the pan, and rub the bottom to get all the delicious seafood flavors to mix into the sauce you are making. In a magic bullet mixer, or food processor, add your heirloom tomato, garlic cloves, parsley, and a pinch of your basil. When they are blended, add them to the pan with the grape tomatoes and shallot. Cook that mix down a little, and add your pepper flakes, some garlic powder, a little salt if needed, and your better than bullion. Cook this mix down a minute, then add your mussels and clams and cover the pan. Once they are cooked, chop up your basil and add it to the mix, along with the rest of the seafood you had set aside. Mix everything together once or twice, then pour the sauce over your pasta.